Do you all remember me talking about my major studio project for the fall, and then basically disappearing off the face of the blogging earth? Well, let's just say that this project consumed and challenged me more than any project to date, but that the satisfaction of completing it (and getting a great mark) was well worth the long hours, piles of discarded ideas, and even tears.
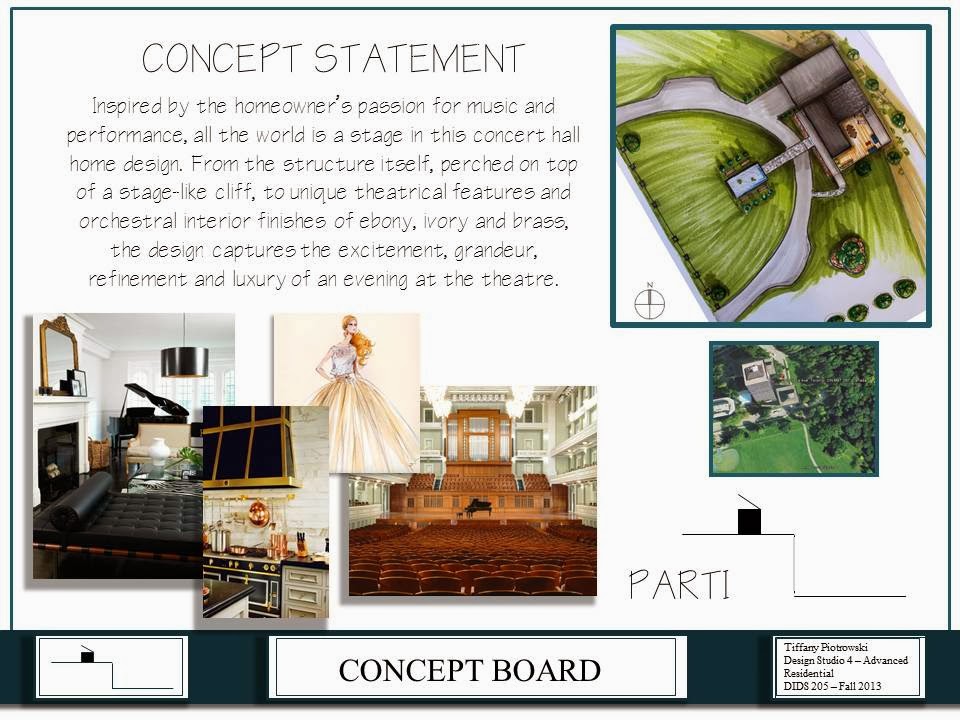
If you recall, my original concept for the house was the piano (as the client is a family of musicians), but as I developed the project further, I moved away from such a literal shape and idea into a larger concept of the stage and performance, into a liveable concert hall idea. I kept some of my original concept, such as the pitched roof, but basically, I wanted the home to capture and reflect the feeling of grandeur associated with attending a night at the theatre, as well as creating a liveable environment that was simultaneously conducive to entertaining, parties and performance. Here is the final result (click on photos to see them in larger format):

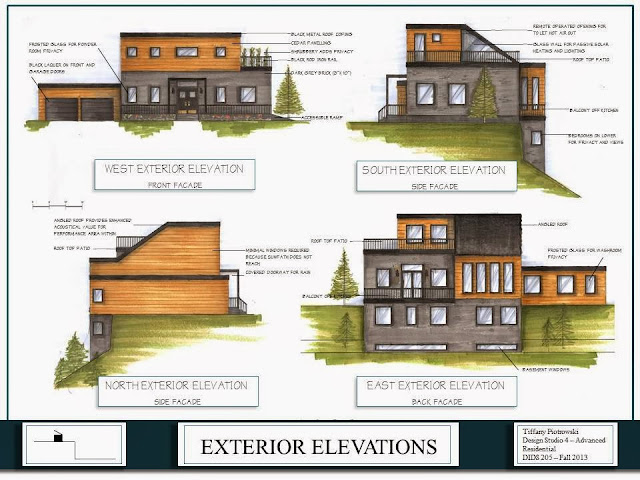


 I was basically architect, structural engineer, landscaper and interior designer for this project and I also had to consider barrier free elements as one family member is in a wheelchair...did I mention the plot of land we were given was on a cliff like hill? That's a lot of hats to wear in ten short weeks, but I am so happy I pulled it off and proud of myself for not giving up!
Here's to a new term! xo

If you recall, my original concept for the house was the piano (as the client is a family of musicians), but as I developed the project further, I moved away from such a literal shape and idea into a larger concept of the stage and performance, into a liveable concert hall idea. I kept some of my original concept, such as the pitched roof, but basically, I wanted the home to capture and reflect the feeling of grandeur associated with attending a night at the theatre, as well as creating a liveable environment that was simultaneously conducive to entertaining, parties and performance. Here is the final result (click on photos to see them in larger format):


Here's to a new term! xo


